Showing posts with label Scrap projects. Show all posts

Sunday, June 21, 2020

Birth of a Quilt


THE BIRTH OF A QUILT
Week one of Stay At Home

I have been toying with the idea of documenting a quilt build from beginning to end, but I have not taken pictures of much of my progress.
I try to be organized when I sew; it helps my mental health immensely to have neatness in my sewing room.
I should start at the beginning of my quilt in this little missive.
I have an AccuQuilt GO fabric cutter and I love it. I bought a lot of dies of shapes that are difficult for me to accomplish because of angles that don’t translate to sewing well. Something I call long legged stars is one. It is actually labeled as a triangle in a square. The die cuts have the corners cut off and when you sew, the pieces go together perfectly because of the flat corners. Flying geese is another block that I can do well with all the ways you can make a flying goose, but the die cut pieces just fall into place and practically sew themselves.
The quilt I am documenting started out as an idea of colors that I have never worked with in a group. Pinks, oranges, yellows and purples came to me in a customer quilt and I fell in love with the look. I like almost all of the colors singularly, but I don’t especially care for pink. I don’t make quilts with pink, and the only one I ever did was for a 3 year old child who went on a shop hop with me because there was no opening at a Head Start for several weeks and she tagged along with me throughout my days, waiting for her chair in a classroom. At one of the shops, her little voice saying ooooh, ooooh, oooh, caught my attention, and when I looked out of the door of the room I was in, she was in the hall standing between two rows of discount fabric bolts in a space only a 3 year old could fit in. She was oooh oooh oohing as she was tugging bolt after bolt of pink fabrics that were screaming her name. I bought a yard of each fabric she chose and actually picked another rich pink to tie them all together and made her a quilt from a block she chose out of my book of 1000 quilt blocks.
Back to my documentation: I stood in front of my cubbies of fabric and pulled pinks, oranges, yellows and purples and stacked t hem on my 
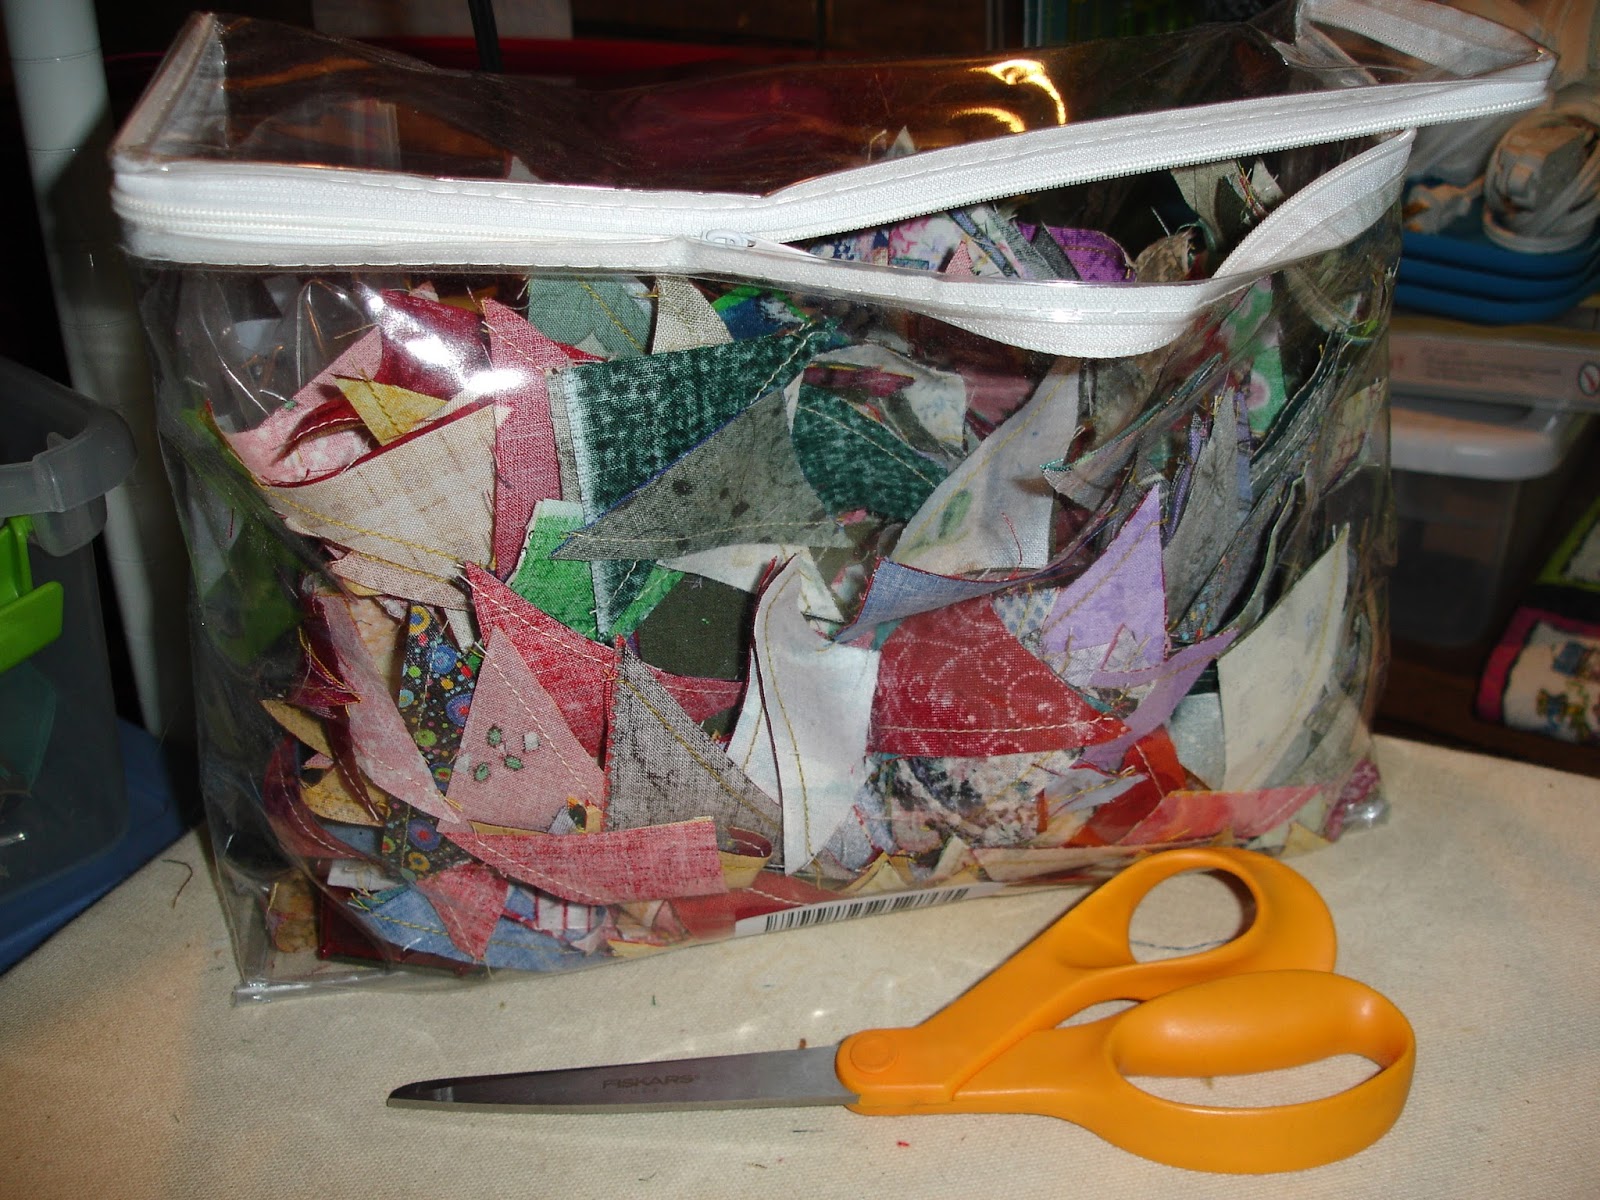
table. I dug out the die cutter and the flying goose die and I cut the fabrics into goose pieces. I put them in a plastic tub and labeled the box (this neatness thing) with a 3 x 5 index card that I marked 6” Flying Geese, Pinks Oranges Yellows and Purples. I put it on a shelf for a future project and promptly forgot about it.
Recently I stumbled onto the box and tried to remember what I had in mind for the quilt and since it is flying geese, they work well in columns. I like column quilts because they are fun to custom quilt and I have a desire to custom quilt a project of my own in the near future. Looking in my EQ program, I found I had already mocked up a quilt with geese in columns and decided to change up my plan a bit and in the columns between the geese I 
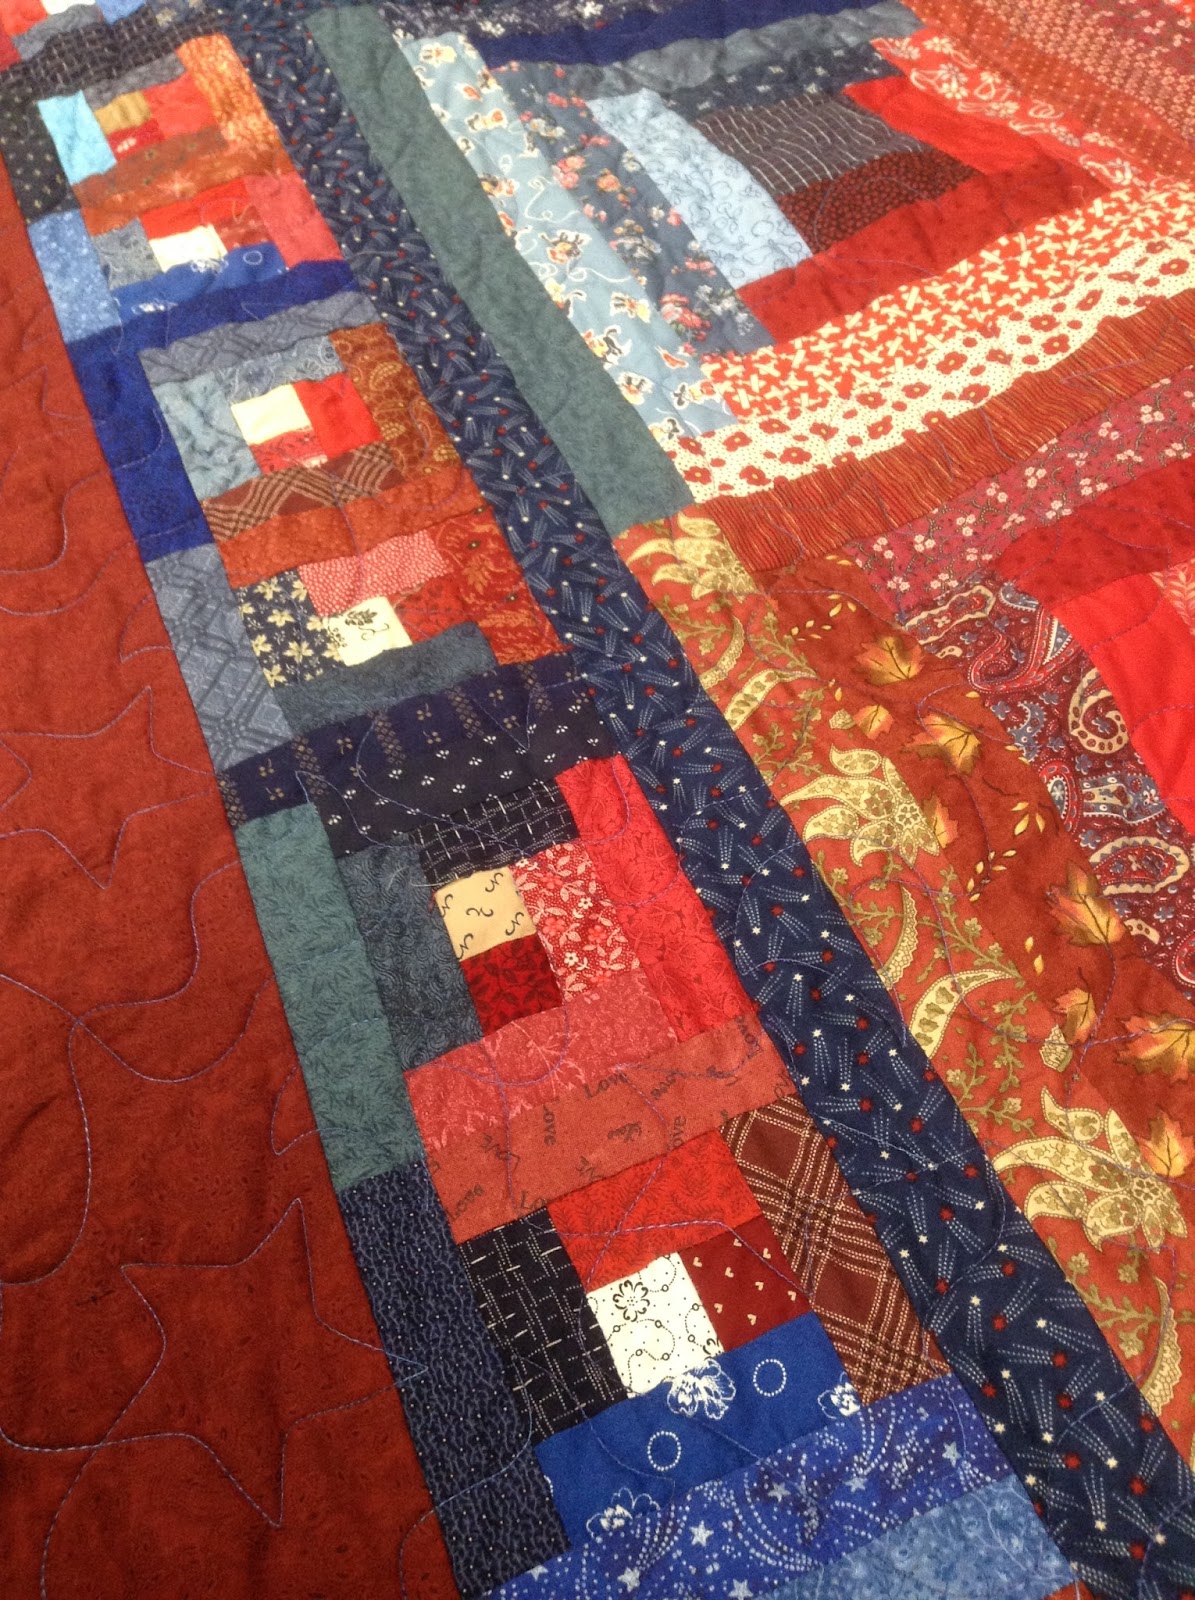
wanted to put log cabin blocks.
The geese columns measure 6” and the column between, 5”. I now needed to go back to the fabric cubbies and find more of the 4 chosen colors, but they have to be subtle because it is the geese that are the stars in this quilt. I don’t have a lot of really light colors, but I found enough to my surprise. I dug through my room and found the graph paper my brother had brought home for me and I cut out a 5” piece to use to design the log cabin block for color placement. Since the log cabin would only have 8 logs and a center, I had to be pretty specific with color placement to use the 4 colors.
Then comes the Corona virus and our world comes screeching to a halt. I still have quilts from customers to quilt, but no longer can we gather in groups and socialize, so I have plenty of spare time to sew. I needed one more color. I was not getting enough variation with my pale versions and wanted a softer orange than I have in house. I ventured out with Tom on a day trip and found several varieties of pale orange and came home with another yard of fabric, but just tiny amounts of each.
I had already pulled a fabric for the outer border when I first cut the geese parts, and I had left in the bottom of the tub with the pieces,
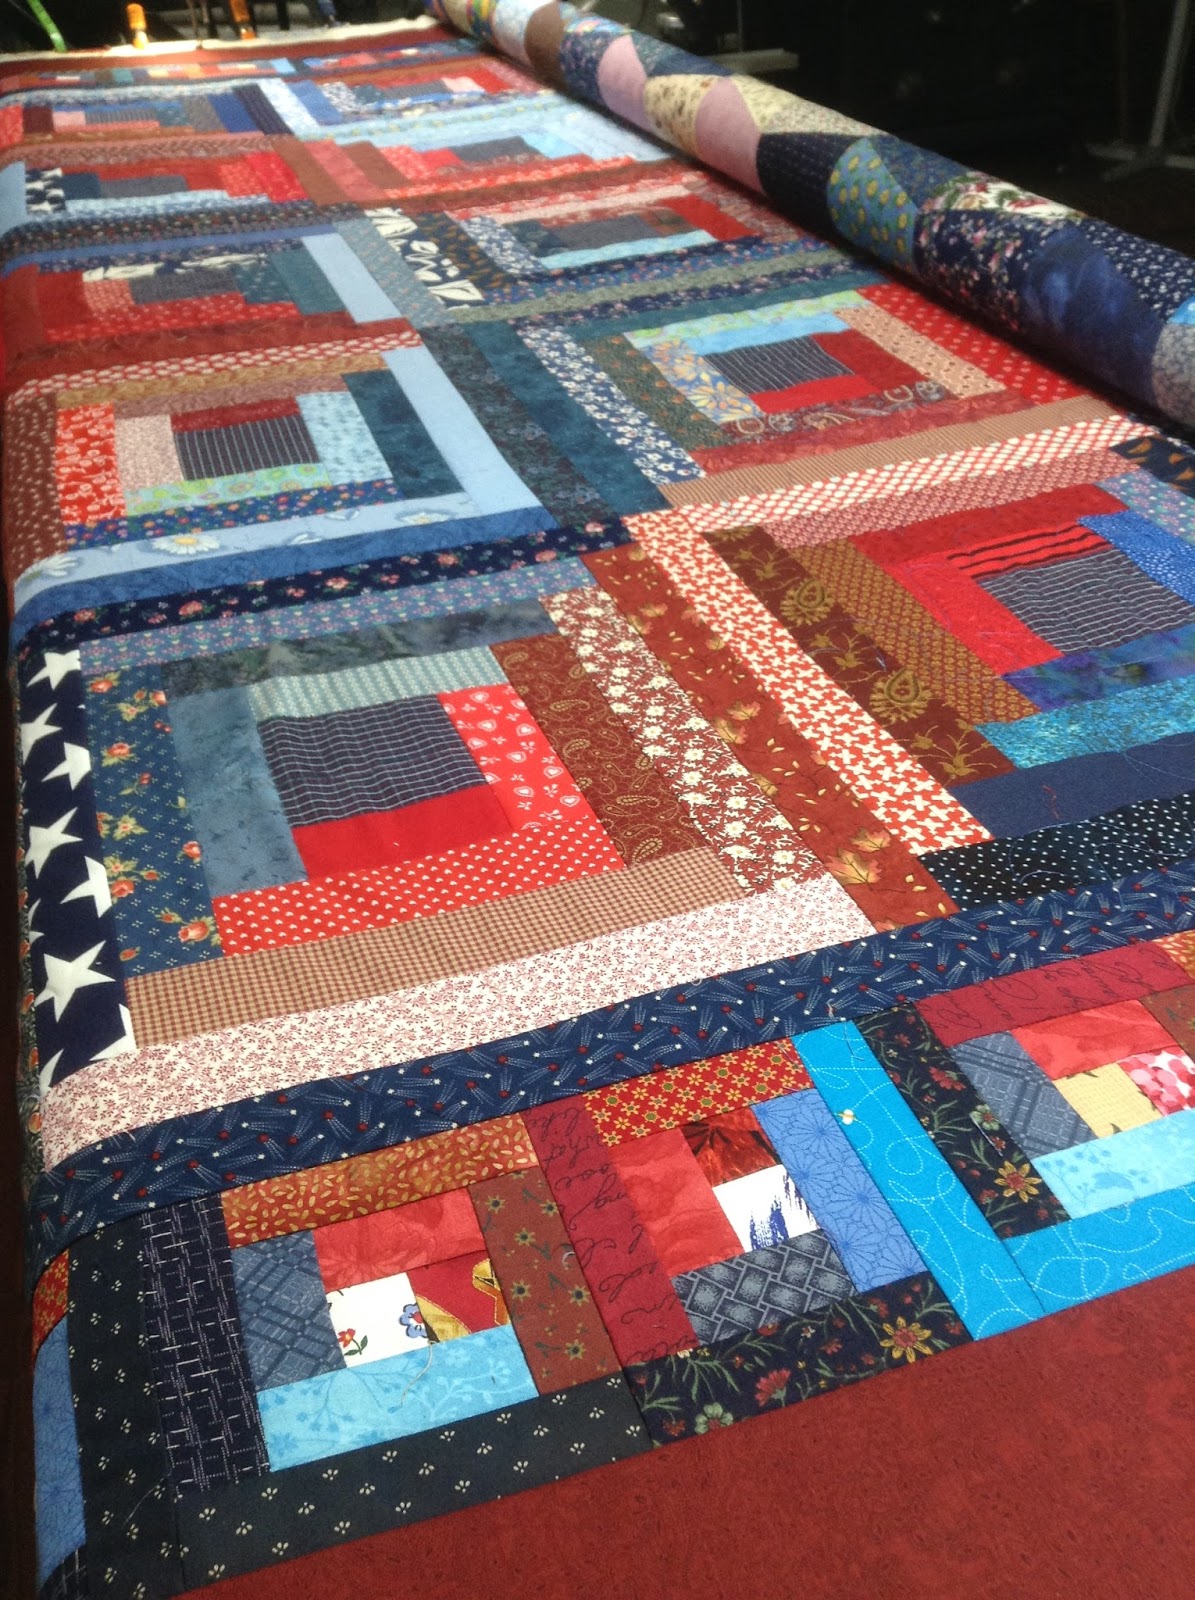
I assembled all my parts, 7 columns of geese and 6 columns of log cabins. When I pulled that perfect piece of fabric I had set aside for the border, (here’s the universe and it’s ha ha moment) it turned out to NOT be a piece of yardage, but a bundle of fat quarters of an entire line of fabric. Think HUGE sigh here, as I am working with colors I am unaccustomed to, and I was so fortunate to have been given this piece of “yardage” that was a perfect choice and it is not going to work. We are now deeper into the quarantine time and I am not willing to venture out into the world one more time for 3 yards of fabric. I will have to make these fat quarters work. I haven’t mentioned how much I hate fat quarters.
Now it’s back to the calculator to test my mad math skills again. You see, I had a large pile of geese left over after assembling the quilt top. They sit in the box forlorn; excluded from being part of the whole.
According to my calculations, four fat quarters would give me the border size I need. I cut four fat quarter fabrics I like together, sew them into a wonderful border, and then find I need just a little more length for the size quilt I want. Don’t you just love how I plan on the fly? This is quilt making at its finest for me. Back into the box, and another 27 flying geese become a column that stretches across the top of the quilt to become a pillow tuck feature.
The top is complete, and I like it!
I get in the tub of backings I have and pull out the orange piece of batik I had been eying the entire time I had been sewing the geese and the log cabin blocks and I’m so excited about my blind choice one day when I shopped at Zincks and picked up a piece of fabric only because I liked it.  It’s another perfect choice that the Universe guided me to. Again, it’s a ha ha moment, and the piece of fabric is only 3 ½ yards long. I need 7 yards. Oy! I get the calculator out AGAIN. It hasn’t failed me yet on this project; I just keep working around the stumbling blocks of not enough and make it work. I can do this again.
I cut the 3 ½ yard length to the length I need, and I have a bit left over. That bit goes on a pile by my table to be put away at a later date (preferably after the quilt is done, just in case I need it). I look in the box at the geese left. There are enough to make 3 more columns! Amazing. I sort them, as 3 rows give me 18”. Add the 18” to the 40” I have from the length of backing I have available, and I have58”. I also found another fabric on the shelf that is yellow and orange that will work. But it is only 12” wide. It must be left over from a backing from another quilt. That leaves about 20” to go, to have enough. I look at the remaining fat quarters, and there are enough (really) to sew them to each other, with some strips of the backing that was left over and set aside to get that last bit of width to give me not only “just enough” but enough extra to make loading the quilt onto the frame possible.
The last four fat quarters get sewn into binding.
If I was the guys on Salvage Dogs, I would have said that worked out just like I drew it up. But actually, it is the Universe, which was not actually laughing at me, but waiting for me to discover it knew all along how all that fabric would come together to be a really lovey idea which was sparked by a customer quilt.
Now that amazes me!

Saturday, June 16, 2018

Time Flies...

June 16, 2018

Time flies whether I am having fun or not. A lot of sayings I grew up with have been fluttering through my thought process lately and one of them is about time flying when fun is on the agenda. Thinking more deeply I see that time flies, PERIOD.

Thursday last I was on the phone for almost 2 hours signing up for Medicare. MEDICARE! Where did the years go? I am so amazed that 65 is the next big birthday for me. I am certainly grateful for the cost of Medicare coverage and the cost of supplemental health insurance to cover the rest of the medical. The lady signing me up was trying to find the most economical deal for me and was happy for all my input and clarification each time we exchanged sentences. It was an interesting experience, to say the least! The amazing thing is even getting an expensive coverage plan (her choice of words) it is a real bargain to me, as I am staggering under the cost of buying my health care on my own since Tom’s retirement plan dumped all us old-timers they didn’t feel like covering anymore due to rising costs. I had a sweet deal for 6 years before the other shoe fell. Boy did it land with a thump!

There was a set amount they put in a fund for us losers of health care and my share of that fund ran out 14 months after I got it. The last 7 months of this year before Medicare kicks in have all been on me, and it takes almost every penny of my Social Security to cover the health care payment. There is something hugely wrong with our medical system.

Layout of Hawks Nest block with pieces for next block on table above it

I have been slowly working on my current quilt projects. I seemed to have lost my mojo and finding it again has been just putting one foot in front of the other and getting through each day. I would think I was depressed, how hard it is to find the desire to sew pieces of fabric together, but I have figured out it is a massive sinus problem! Besides being hot and tired all the time and being fuzzy in the thinking department, there is that quilt each day that needs to be quilted. My schedule is full. I get the job done and go home. Then I fall asleep in my chair and wake up in time to go to bed. Where is the MOJO!

Hawks Nest

Old habits kick in and five minutes of sewing each day still gets things done. Very slowly, but a block at a time is still getting sewing done.

Hawks Nest 2 finished blocks

I’m organized and settled in the house. I miss being able to get up really early and go into the studio to quilt, but the flip side of that coin is I get to walk away from the shop and come home. There is no WiFi at the studio, so there is no computer perusing during the day. I do the quilting, I come home. I sew a block. And I look for my mojo. I know I will find it, I have found almost everything else that got displaced in two moves.

Hawks Nest 12 finished blocks

I hope to get more quilts going and I need to remember I have finished many projects that got started and put in little shoe box tubs. I have a stack of empty ones in the closet.

This year my goal is to make as many twin size quilts for charitable purposes as I possibly can. I took 5 to my friend, Karen, last week. She knows where to take them for people who need them.

Lay out on design wall

I learned how to “web a top” by watching a web cam video Bonnie Hunter had on her site. I have read about it on her blog, but I could not figure out how to do it. Seeing it on the video made it all clear and now I am looking forward to getting a set of quilt blocks done so I can try this simple assembly system she described. 

Webbed top to bottom all the way across

Sewing webbed and pressed rows into a finished block

I practiced today on a quilt block that was 13 x 13 blocks in size. I was amazed at the speed I put the whole thing together, from layout on the design wall to pressed and back on the wall as a finished unit. I will look at it for a while and make 5 more in the future and make a crib quilt.

Finished block back on the design wall

Hawk's Nest is my latest ongoing project while I look for the mojo. I know it will hit me full force in the process of looking, so I just keep sewing. A little at a time is better than no sewing at all.

Hawks Nest trial layout

Happy June! 4 days until summer!

Sunday, December 24, 2017

2017 Another Year Gone...

I am on my Christmas break. Emily is reading in the living room and Tom is fixing lunch. It is Christmas Eve day. I am in the sewing room making samples and writing up instructions for my quilts on the hoof.

I am making a Lady of the Lake quilt and it will be scrappy. The only consistent thing is the large half square triangle in the middle. 

Lady of the Lake sample block

The half square triangles that go around the block are scrappy anything. The light side of the triangle is all tans from very light to no darker than a paper bag. The colors are anything I find in my box of 2 ½” squares. I am trying to use as much of the cut stuff as possible. I have lots of 2 ½’ squares.

The fun part of this is the bonus half square triangle that comes from making the block parts. If you mark a second line 3/8” from the original diagonal line and sew it as well, when you cut the space between the sewn lines, you get two half square triangles.

   
One for the current project and one for the bonus block box.
I have made several quilts from the bonus block box and since there are so many possibilities, it is worth making them for future use. Unfortunately it is twice as much pressing of half square triangles, but there is the plus side of not having to make 2” half square triangles for the small blocks with which I am so enamored.

4 X Square with dark squares

4 X Square with light squares

To find ideas for using them, I look everywhere for block ideas and build my quilt on EQ7. 


This time my bonus half squares are going to be made into a block called 4 X Star which I found in the block tool from Ladies Art Company. I think this would be an excellent project to take to a quilt retreat. I have a tub of 2” strips for the 9 patch blocks in the center. The color possibilities can be endless and I don’t have to cut anything but the sub cutting of units to sew. I get to use of stuff.

I have lots of scraps of fabrics to cut into usable parts hanging around. I get gifted with fabric from various people who are not going to use what is left from some project or other.
Honestly, I probably don’t need to buy anymore for quite some time.

I took a buying hiatus several years ago and used such a lot of fabric in a 2 ½ year time frame. The price of fabric had sky rocketed in my non buying phase, and now it just freaks me out how much it costs to make a quilt. I’ll stick with scrappy and use up what I have.


All the pictures shown of finished blocks are just my samples so I remember how to assemble things and can see how to press things when I actually make the block. I like to be organized.
The ideas for making bonus blocks I learned from Bonnie Hunter and her scrap organization techniques.

Saturday, January 16, 2016

Seven Shirts

I have a friend in Pinterest.  


One day my friend, Pattie, asked me how many pins I have on my Pinterest account.  I didn’t know. How do you find that out? She said it is right under my name when I open Pinterest.  Well I’ll be.  I have around 450 pins. She had over 4000! Me thinks she has too many days with headaches.

I bought a Go fabric cutter.  I get an urge to find a pattern to use shapes I have bought and I start looking at quilt patterns.  I am a quilt builder more than a pattern follower.  I find inspiration in things and go from there. Most of my Pinterest folders are different types of quilts for the different shapes I have for my Go cutter.

I have a plethora of men’s shirts that I blame solely on Bonnie Hunter.  She came to talk at our guild one year and show us her quilts.  I left with an urgent need to buy men’s shirts at the thrift store.  I have two huge Rubbermaid tubs of 100% cotton shirts. 

I was perusing Pinterest one night and I found a pattern for a quilt that uses 7 shirts to make a quilt. A link led me to Thrifty Quilter blog and she gives wonderful instructions on how to use 7 shirts to make a quilt.  I’m hooked! I just happen to have 100 % cotton shirts! I started digging around in one of the tubs and pulled a few shirts and then decided that I needed one more color so I got in the other tub.  Well guess what? The other tub is filled with fabric pieces of shirts that have been cut apart.  My friend Pattie did me a huge kindness and cut many of my shirts apart for me. I started feeling guilty having all those perfectly good shirts that I was just cutting up and there are people who could probably use them to keep warm and I stopped after cutting apart a dozen or so.

Out came 7 shirts in usable parts and I cut them according to the directions in the Thrifty Quilter blog. I did not read all the way through and sub cut the light strips into 2 ½” squares.  I wasn’t supposed to do that.  So I didn’t make my quilt exactly like hers.  I had a lot of pieces to use up.  Fortunately I stopped before I cut everything into squares and started doing the sewing according to the directions.  Because I had cut so many strips into squares I could not make the piano key borders, so I am making 9 patch blocks instead for the outside border.  It’s fun in a way, finding enough squares of each color to do what I have planned to finish up my thrifty 7 shirt quilt. 

my layout, different a little from Thrifty Quilter

I have told myself all along this was the experimental shirt quilt.  I think I will go pull 7 more shirt parts and start anew.

I bordered my quilt with 9 patches instead of piano key strips

Sunday, October 25, 2015

Sometimes I make it up as I go…

I have a plethora of bonus half square triangles from several projects I have made in the past 2 years.  Bonus half squares are made when you sew a second seam to a square you are adding to a rectangle to make a triangle be on the corner of the rectangle.  Clear as mud I know.  But when the thought of making tiny half squares for a project seems overwhelming, it is a wonder to get them as a bonus when you take the time to sew the extra seam! I learned this trick from a class I took from Bonnie Hunter years ago.  She has lots of tips and tricks on her web site that make so much sense. Waste not want not is probably her mantra.

Stars over Challotte
I made a quilt last year from one of Bonnie’s books called Stars over Challotte.  It used up a huge number of bonus half squares and then of course I made a few more quilts that netted me many more bonus half squares. My little box of them is overflowing and I wanted to come up with something for using them up.  

9 patch stars
I decided to make a little 6” star with a 9 patch in the center.  The 9 patch is surrounded by half square triangles that make star points. I had lots of blue and brown and green and brown half squares so I made my little stars have brown points.


When I drafted my original pattern I needed somewhere in the vicinity of 72 stars.  I decided the stars would be pretty busy so I went back to the drawing board and made my pattern have a second block that would create the look of chains between the stars.

Yuck, back choice.

I liked the little tan and blue 9 patches that created the center of the star and decided to make the chain blocks from four red and tan 9 patch blocks.  I made four of them and sewed them together but there was now too much red to go with the blue and green so I went back to the drawing board.


make lots of sets and sub cut all at once. saves time!
My EQ7 program really got a work out this morning as I refigured the layout of the quilt. I settled on making the chain blocks from red and cream 4 patches. I will set 5 of them into a 9 patch using cream squares to separate them, and the chain will still be red but not so overpowering.


Even with all the stars I barely made a dent in the half square bonus box.  I am not even making a noticeable dent in my red and cream bags of strips as I create the four patch blocks.  

red and cream bags of 1 1/2" strips
I still need to round up the cream background to make squares to set the red and cream four patches together, but I have a handle on what I want to do now.  

How I remember things (grin)
The little cutie red and cream squares are being worked up in sets of 10.  I need 250 units to make up 50 blocks my pattern requires.  I have 40 units done.

Wednesday, October 7, 2015

Emily's Project

When the girls were young they spent their summer vacations here and we played between my quilting jobs.  As children interested in what any adult is doing, they wanted to learn to sew.  I taught several young ones how to make quilts and Emily and Laura were quick learners.


By the tender age of 6 Emily was seated at a sewing machine with the pedal on a stool so she could reach it.  Laura followed the summer after with the same setup. 


By age 7 both girls had sewn at least 3 quilts each and when they got tall enough I let them quilt the quilts they made on my longarm.


I do a lot of charity quilts and often they ask to quilt and a charity quilt goes on the frame and they feel good doing a good deed for someone in need.


Emily is a senior now and one of her classes is community service oriented.  She visits an elementary school two times a week during her school day and she helps the teacher with 2nd graders.  

The youngsters think she is an old lady and she enjoys helping them.  Talking with her about her experiences is very enlightening.  She fields difficult questions at times and answers them with maturity and wisdom.


She took my book of 1000 quilt blocks in to them one day with the idea of showing them the varied types of quilt blocks and is having each child in the class design their own block.  Emily has taken on a huge task of building the blocks each child designs and will turn all of the blocks into a quilt.  I’m not quite sure what will become of the quilt after she is finished but she tells them about making quilts for charity.  I think this may go into the charity pile.  


The blocks on paper are colored in by each child who designs it.  Emily asked me recently how she should go about resizing the ones that won’t fit nicely into her 9” block scheme when they are specifically 8” as drawn.  We solved that by her adding a border to the finished block.


She spent this past weekend building the first 4 blocks of the 23 that she expects from her students.  One in particular is very intricate and the finished block is quite stunning.  She spent the entire weekend sewing the four blocks pictured, saving the hardest for last.  I’m very impressed with the precision she has achieved on this very noble project she has undertaken.


We talked about how to make the different units and I explained how much extra fabric it takes for a half square triangle block and the hour glass blocks.  She went away with her verbal instructions and came back with 4 very beautiful blocks.  

Thursday, July 23, 2015

Tidying Up

I have been busy these past few months on various projects.  The chaos needs tamed and the clutter needs to be attacked and organized again. Yes, again.


I have this zipper bag full of bonus half square triangles that I have gotten from various projects I worked on in the past 18 months.  


It is amazing how many bonus half squares you can get just from one quilt!  I did two with lots of rectangles that had squares sewn at an angle on each end of the rectangle and I think I had over a thousand bonus HST’s from each.

I am currently working on another project making more bonus HST’s and I decided to trim and sew them as I do each block so I don’t end up with the plastic bag full of “stuff to do.” It just won’t go away by itself. The current project is Bonnie Hunter’s Boxy Stars. A free pattern on her website.


I didn’t have the energy to do pressing it was going to take to empty this bag and today I decided I just needed to get it done. 


Now I have a very full box of bonus half square triangles and I need to find another project to use them in.


I used a lot of them in the Stars over Challotte quilt I found in a Bonnie Hunter book.
  

I liked the zig zag of the setting triangles.  The dark fabric really lets the stars shine.


I also figured out how to make a bear paw block using the half squares as well and that is a pleasing manly quilt. I found the perfect fabric in my stash for the large square and had fun matching the four I needed for each paw.


I’m sure the mess will never go away but I feel better knowing I no longer have that bag of unpressed triangles looking at me.

I’m going to go outside and enjoy this perfect summer evening.

Sunday, July 19, 2015

Organized Scrap Usage

I have a lot of scrap fabric to use in my life time.  Every time I see the light at the end of the tunnel another bag of fabric finds its way into my studio.

I have two industrious helpers who sort and press the fabric for me.  Last summer Laura and Emily cut two huge rubber maid tubs of fabric into every useful shape imaginable. Their countless hours netted me a medium sized tub (12” x 14” x 16”) of 2 ½” x 5” rectangles, a small tub (10” x 12” x 5”) of 2” strips and a shoe box full of 2 ½” strips.

I already have two big rubber maid tubs of 1 ½” strips sorted conveniently into plastic Ziploc bags by color.  My goal is to use this fabric up.  I was making a decent job of it and then I looked and away for a minute and 3 huge rubber made tubs are again full of uncut, unsorted fabric needing some TLC. (HUGE SIGH!)

I have made 4 large block log cabin quilts already from the tub of 2” strips and they just don’t seem to go away! The only thing that seemed to happen in the 2” strip tub is they all got short.

By big block log cabin #4 I decided to make one of the borders be tiny log cabin blocks made from the 1 ½” strips.  I also chose to make the BBLC in just blue and red instead of light and dark contrast.

My friend, Pattie, has been utilizing my Accu Cutter trying to tame her own fabric collection by making 6” tumblers and I suspect the two tubs of recent small stuff acquisition is from her.  I like the tumbler quilts she has made and one of them was tumblers on the front and back. I decided the tumblers  was an excellent way to use the plethora of scraps I just can’t seem to eliminate.  I sorted through the tubs and found all the red and blue and creams I could find and sat with Pattie one fine Monday and cut my fabric into tumblers.

I’m so in love with how the tumbler backing came out I am planning on doing another two big block log cabins with tumbler backings.


I was sure I was pushing my tolerance of doing the same quilt more than once by the time I hit big block quilt number four, and it just goes to show that you never know!

Sunday, May 24, 2015

A Funny Thing Happened on the Way to this Quilt

I did a pantograph on a customer’s quilt one day last year and I fell in love with her quilt top.  This is a common thing that happens to someone addicted to fabric. I love scrappy quilts and I am happy to adapt a pattern I see to something that so readily uses what I have a plethora of.
I have made 3 long cabin quilts with 2” strips and I am so enamoured with that pattern and how much scrap fabric I use making the pattern that I have a 4th log cabin quilt precut and in a tub to go to a quilt getaway in July.  That will be another story for another day. Since I have made so many log cabins, the 2” strips are getting short (in length, not in abundance) and I needed to find a pattern to use the smaller pieces that litter the tub.

I opened up the trusty EQ7 and designed the 36 patch square block which is framed with a solid fabric.  The charm of the customers quilt was that the scrappy squares are framed with different solid fabrics.  All were sashed with narrow white strips which made the scrappy squares pop.


My designing session resulted in a nice paper with a printout of my quilt top in black and white.  I needed 63 blocks for this top.  I spent several weekends pairing small strips into groups of six that would get sewn into a group of six and sub cut into 6 rows of 6 blocks.  I put 6 different sets into use pulling one strip set from each to make a block and had 5 strip sets left over to mix together into other combinations.  Because I needed 63 blocks I needed 63 sets of 6 strips.  Clear as mud?  Of course I did not photograph this process because it didn’t occur to me I would screw something up and need to tell you about how I overthink things.


I made the 63 blocks and then dug through my glorious stash looking for enough plain fabric to make 63 frames.  A width of fabric strip could net me frames for 2 blocks so technically I needed 32 colors to get a good mix.  (I had that!). I messed up a couple of frames cutting off the selvedge. Lesson #1:   I did not have enough fabric to make two frames if I cut off the selvedge.  


I am merrily sewing frames to blocks and happy I was so far along on the sewing of the quilt top and started thinking (the brain freewheels when I do mindless tasks) about how big each block is and I did the mental calculation and realized 63 blocks was going to make a humongous quilt top.  Hmmm.  Where did I make the miscalculation? My top would be 9 rows long and 7 rows wide and would make a twin.  That was my goal.  9 x 12 is 108 and this is without the 1” sashing! 7 x 12 is 84. Right there is a queen and I didn’t want that. I wanted white sashing too! I looked up my pattern in the EQ program and see I have blocked out the pattern of 12” blocks using a 9” setting tool. OY. At least that problem is solved.  I see where I made the mistake.  Using less blocks is a good solution and the extra 6 give Pattie plenty of throw-away options in her laying out the top.  


The rejects went on the back.


Yesterday I sewed the rows together, found a fabric to use for backing and sewed the extra blocks into it and even had time to load it onto the frame.  Today I quilt!  I love getting to the end.  My brain is already on the next quilt.